This tutorial will show you how to properly dump cassette software using a datassette recorder and a 1530USB adapter connected to a Windows PC, in order to obtain a .TAP file that can be used on any emulator (VICE/theVIC20/theC64). TAP files can be used also on the physical VIC-20 by using a Tapuino device or you could even re-save it to a regular cassette when you need it.
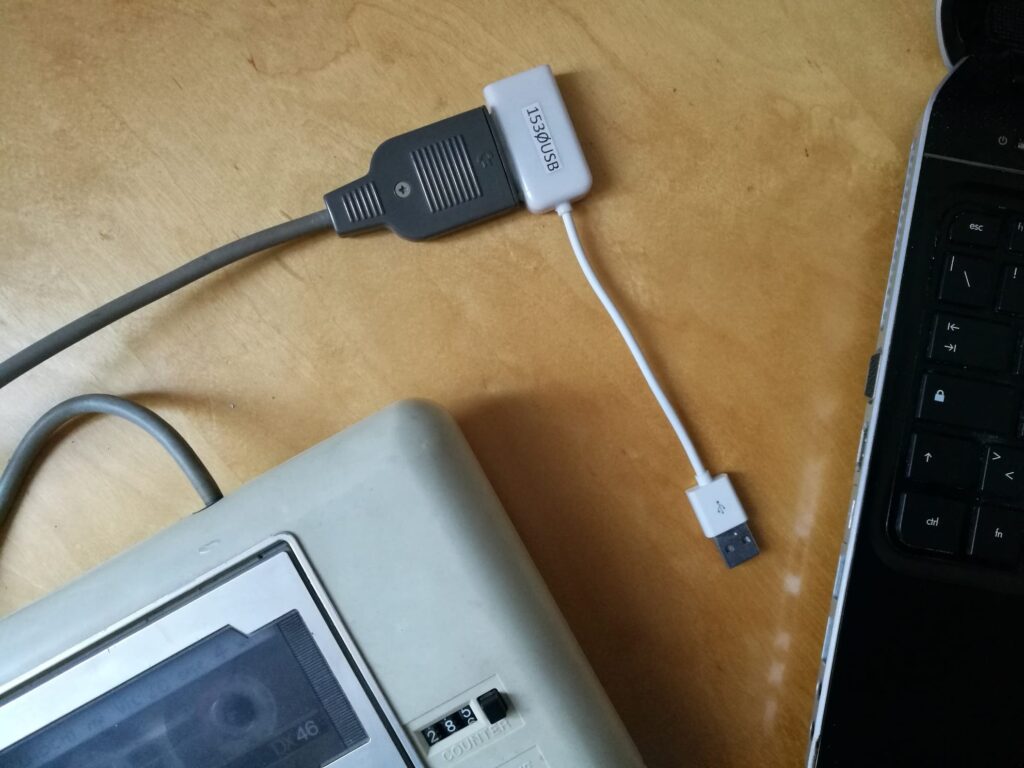
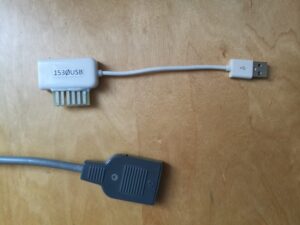
The 1530USB adapter
I found this adapter as a convenient way to turn cassettes to digital format, thus preventing the natural deterioration of old tapes and eventually freeing up space, since the TAP files are much easier to handle as they occupy just a few megabytes on your hard disk drive.
I bought the adapter from www.load64.com/1530usb/ and it came properly packaged a few days later. The website also provides link to tutorials which I found very useful for converting C64 tapes, but after thorough testing specifically on VIC-20 tapes I have several extra recommendations.
One side of the adapter plugs into your datassette socket, the other plugs into any USB port of your computer (it is recommended to plug it into USB 2.0 ports only).
This device is capable to perform not only the dumping, but also the converse, saving on a cassette the contents of a TAP file (we don’t cover this part in this tutorial, though).
Preparation
Before starting the dumping of cassettes there is a procedure to follow in order to properly set up the adapter, it is described on this site with more detail.
In brief, after plugging the adapter to your Windows computer, you need to wait until the installation notification closes. The adapter will then show up in your computer as an audio device. You have to open the audio devices control page and then perform a few tweaks on it such as setting up the highest sampling rate (480000 Hz), disabling the Automatic Gain Control (AGC) while reading, setting up the volume, and so on. Please refer to the manufacturer site linked above for this part, it is explained very well.
I recommend also checking that the datassette head is clean (if not, use alcohol and a cotton swab to clean it) and that it is properly aligned. If you are able to load all the programs from cassette using a physical VIC-20, then it is OK. Be aware that power supply devices and other electronic items near the datassette and the adapter can create nasty interferences which would probably ruin the grabbing process. So, push away all electronic object from the datassette and the cable – I will explain later how to check for interferences before the dumping.
In order to perform the tape capture you need three software bits:
- Audacity (Used for grabbing the tape in WAV format – I used the portable version) here
- AudioTap (Used to convert from WAV to TAP) here
- TapClean FE (used to optimize and clean the TAP file) here
For your convenience, there is a software kit linked below which contains a copy of the software I used plus a PDF copy of the official guides.
1. Grabbing a tape to WAV file
I used Audacity Portable Edition. After opening the program I recommend clicking the loudspeaker icon in your PC and selecting the ordinary audio output (PC speakers) so that you will hear the tape sound coming out while grabbing: this is very useful to assess if the sound is clean or if you have interferences.
Click PLAY on tape, then click the Record button in Audacity. At the first use you have to adjust the recording volume slider until the sound graph fills well all the space, see the following picture:
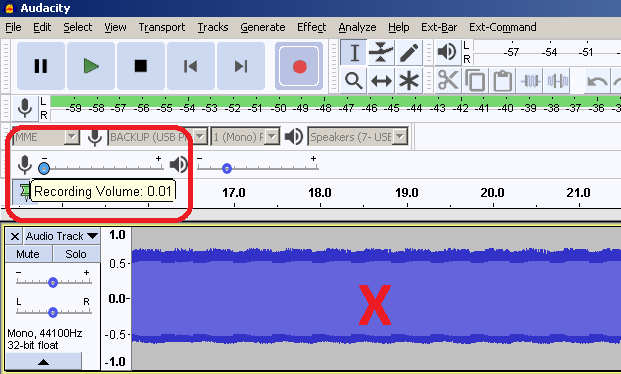
In order to assess the presence of interferences, you just watch what happens during pauses (silence gaps between programs). If you see spikes and sound “ticks” during pauses, then you have an interference – try moving things around and pushing away electrical devices that may interfere.
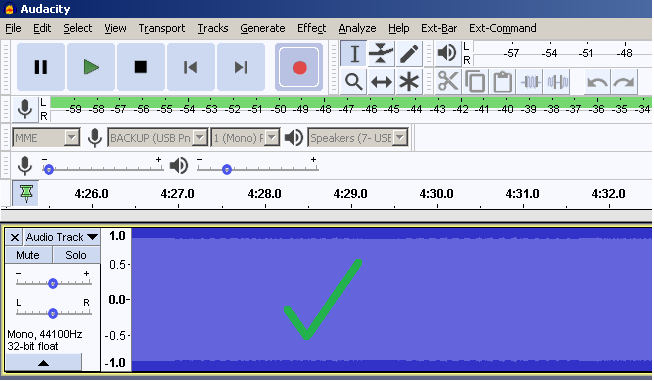
After performing this inital adjusting, rewind the tape and use File->Close in Audacity. You are now in a new empty Audacity window and ready to record. Hit PLAY on the tape, Record in Audacity and wait until the tape ends.
When finished recording, click the square STOP button in Audacity. Then go File->Export as WAV.
Your cassette is now a WAV audio file.
2. Converting the WAV to TAP
 The conversion job is performed using AudioTap. The software is portable so just double-click the executable program.
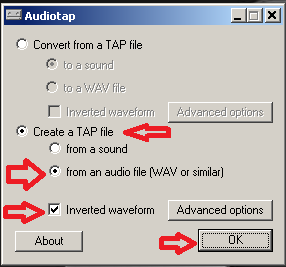
Be sure to check the Inverted waveform option, then click Advanced Options. Select VIC-20 there, then back to main screen.
After clicking OK you will browse and select the WAV to be converted. Conversion will take a few seconds.
Your cassette is now a TAP file.
Please note that, although the TAP might already work fine at this point, it is recommended to perform also the next optimization step which will minimize the risk of load errors and will let you cut out the unneeded spaces thus saving loading time.
3. TAP cleaning and optimization
I found a number of similar tools to perform TAP optimization but I found just one perfectly working for VIC-20 tapes and capable of performing little edits which will make the final result much cleaner.
So even though the manufacturer provides another option, I recommend you download and use TapClean FE (FrontEnd) by Luigi Di Fraia. The tool requires you install first a sort of framework (called GTK Framework) then the program “tapcleanfe.exe” will start with a simple double click.
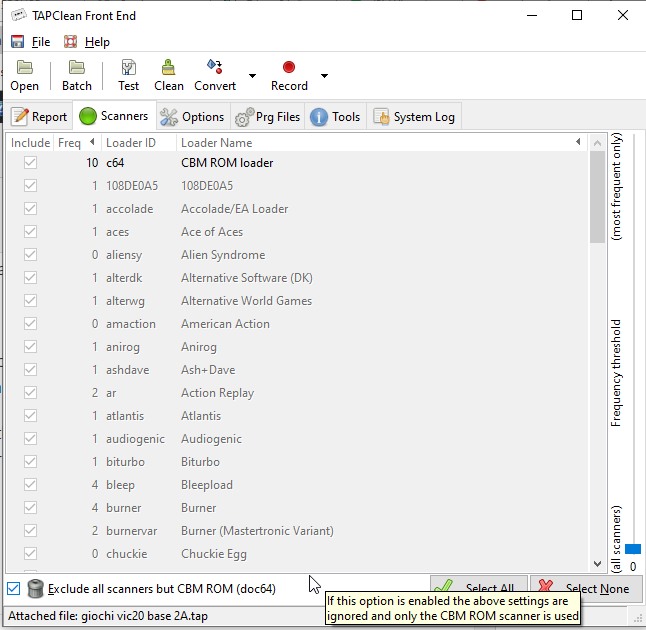 Firstly, go in the Scanners tab and click the checbox at the bottom in order to disable all scanners – extensions which would seek special recordings such as C64’s Turbo Tape – as these recording formats are not used in the VIC-20.
The click the Options tab and check the sensitivity slider – it should be 10 for the first trial.
Now we are ready to go. Open your TAP file with File-Open and then click the TEST button. You will see a window flashing then the results can be read in the Report tab.
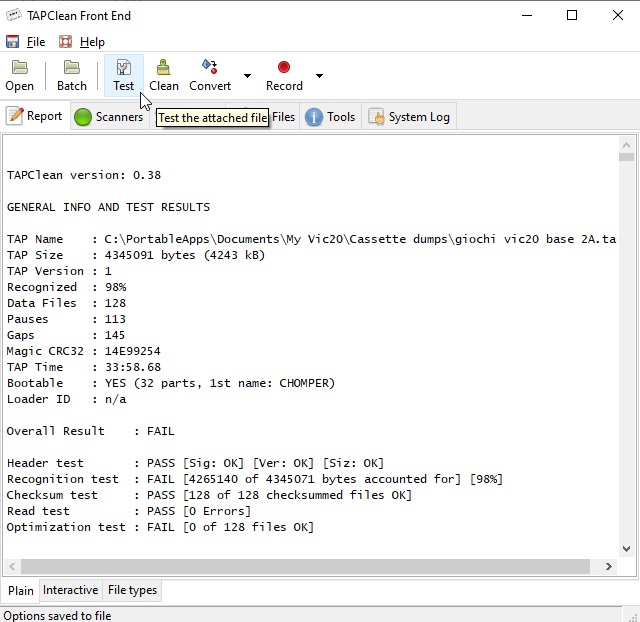
Under Overall Result you will read OK only if the TAP is absolutely perfect. If you read FAIL don’t worry – it is quite likely that after optimization you will get a perfect TAP file anyway.
The key number is the percentage under “Recognition test” – it should be 98% at least. If it is significantly lower it is likely you will not be able to load a few parts, so you could try first adjusting the sensitivity under Options and re-testing until you find the best recognition percentage.
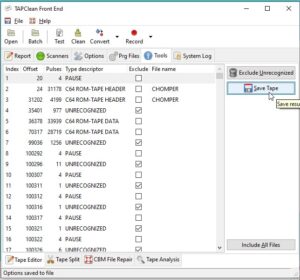
When ready for optimization, you go under Tools tab, click Exclude Unrecognized to exclude useless parts of the tape, then click Save Tape to get the final, optimized result.
You now have a fully clean and optimized TAP file.
Get the edited TAP into the emulator (Alt-T to virtually insert the tape), and try it out with the usual LOAD commands.
4. Advanced edits
Removing pauses: Two pauses next to each other are enough so no need to put more than one. In the TapClean FE Tools tab, just check the ones you want to be excluded from the final edited file before clicking Save Tape.
Recovering faulty programs: If you get Load Errors, please note that on Cassette tapes programs are saved twice, the second copy for verification. So, one copy might be faulty but the other one could be OK. Please note that under the Prg Files tab you also have an option to right click and Save as PRG single files so you could try and recover a file instance. Just remember to save the program portion and not the tape header with the program title, as this is a frequent mistake using the program. This feature properly will be covered in a next tutorial.
5. Software kit
I have prepared a software package to help users putting together the complete solution. The file linked below is a ZIP containing:
- AudacityPortable
- AudioTap 2.2.1
- TapClean FE 0.40 (2019) + GTK2 Runtime (required)
- 1530USB Guides (PDF)
- TapClean FE Manual
- other tap cleaning software (folder)
Software tested with Windows 10 64bit.
Please feel free to leave a comment or to place a rating with the star system. Don’t miss new posts either via e-mail subscription or via push notifications (bell icon lower right).
