If you have tried downloading the WinVICEemulator for your Windows10 computer and have had troubles configuring the emulator correctly, we have a package that is ready to run and that can be used to quickly run games and programs without hassles, with all pre-made settings.
This is the version 2.3 for 64bit Windows, so it will work on most recent computers. There are newer versions but I chose this because it is the one that on my own PC ran better in most situations.
1. Download & Unzip
In order to have the emulator up and running, you just need to download the ZIP from the link below:
Save the file somewhere handy (desktop is the best place for me) and extract the contents with right-click, extract all. You should get a new folder named WinVICE-2.3-x64-preconfigured. Enter this folder.
2. Run the emulator
There is no installation needed, the program is portable so it can be simply run with a double click on XVIC.EXE.
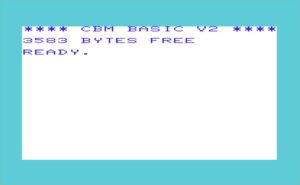
A new window should open with the familiar 3583 bytes free – ready. prompt. You are now ready to go.
In order to understand how to use the various file formats, in the folder you will find three files:
- PRG: vic-20-Krell (1982).prg – PRG is a single runnable program
- D64: vic-20games16k.d64 – D64 is a diskette
- TAP: vic-20games.tap – TAP is a tape dump file (like a cassette)
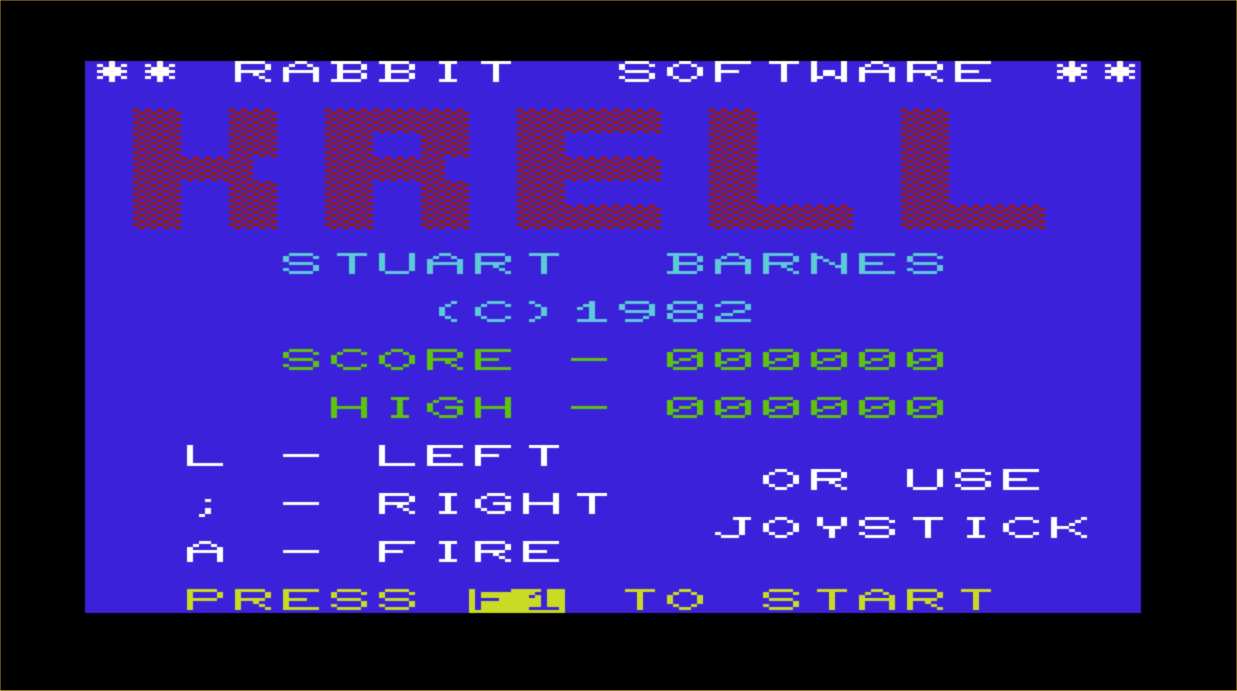 Let’s start with PRG: Drag the PRG file directly onto the VIC window, the Krell game will start.
3. Controls
The emulator is preconfigured to use the keyboard as it was a joystick. If you use the arrow keys and press the right CTRL key as fire, the VIC-20 emulator will think you are using a joystick.
The keyboard mapping is a different issue. You have to use the keyboard like if it was a VIC-20 keyboard regardless of the key symbol printed on it.
 So:
So:
- Left CTRL will act as the C= (Commodore) key
- CAPS LOCK key will act as RUN-STOP
- TAB will be the VIC’s CTRL key
- TAB + 6 will turn the cursor to GREEN color
and so on.
4. Running programs from tape
Use Alt-R to reset the emulator and be ready to run a new program.
Drag the vic-20games.tap file onto the emulator window. This does a few things altogether:
- Attaches the tape image to the emulator (like inserting a cassette). You normally would do this with Alt-T
- Auto-types the autorun sequence (Shift + RUN-STOP)
- Puts the emulator into “Warp Mode” so the loading would be ultra-fast until the first encountered program is found and run.
After playing the first game you can reset the emulator with Alt-R and restart a new game with the usual
LOAD (Enter)
RUN (Enter)
sequence. Be aware the the virtual cassette needs to be operated using the menu (File->Cassette control then Start, Stop, Fast forward, etc.) like you would do with a physical cassette player.
5. Memory expansion
Time for testing the memory expansion and try out a virtual diskette containing several nice 16k games.
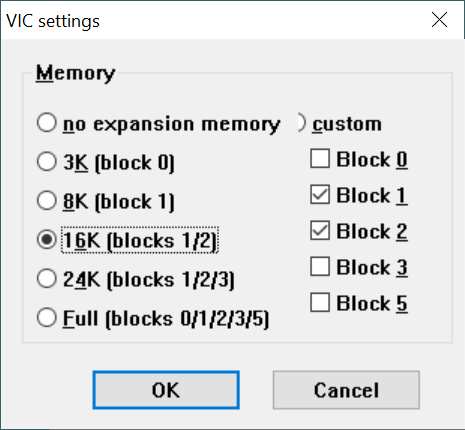 Using the menu choose: Settings->VIC Settings… then under Memory select 16k then OK.
Then press Alt-R for reset.
Now the available memory should read: 19967 bytes.
Now, let’s attach a d64 diskette image: Press Alt-8 (mnemonic: 8 is diskette device number 8) then select vic20-games16k.d64. Finally on the keyboard:
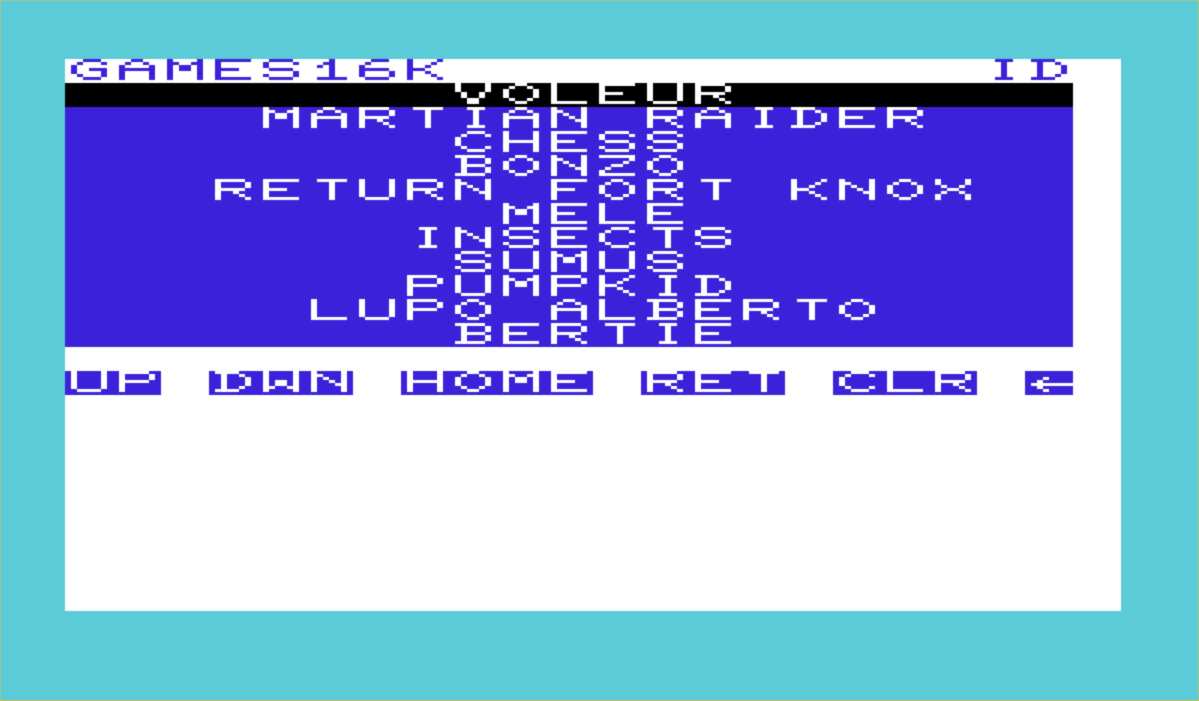 LOAD”*”,8 (hit Enter)
RUN (hit Enter)
You have now successfully loaded and run the menu program which is the first encountered on in the d64 diskette.
You can use Alt-R and repeat from LOAD above to use other games on the same diskette.
Conclusions
We have seen how to very simply run the VIC-20 emulator on your Windows10 machine and use all popular kinds of files for the VIC-20 emulator.
If you feel like more functions should be explained in this tutorial, then leave a comment below.
Don’t forget to SUBSCRIBE to email notifications on this website so that you get informed about new posts!

Thank you! Fun!!