“You are the controller”, remember this slogan? In this tutorial we make a movement-controlled version of the arcade classic “Breakout” using Arduino.
A distance sensor (using ultrasonic pulses) attached to Arduino will be used to detect the player’s hand position, in order to control the paddle.
VIC-20 will control everything: at regular intervals, VIC-20 will send to Arduino a command meaning “where’s the player’s hand?”. Upon receiving this command, Arduino will measure the distance of the hand from the sensor, then it will send back to VIC-20 a number ranging from zero to 19: it will be used for positioning the paddle on the screen.
Required hardware
- Arduino Uno R3 (or other equivalent) and breadboard
- HC-SR04 distance sensor (buying advice at bottom page)
- A few patch cables
- A physical VIC-20 (recommended 16K expansion)
- VIC-20 user port serial cable (as built in project #1)
Building it
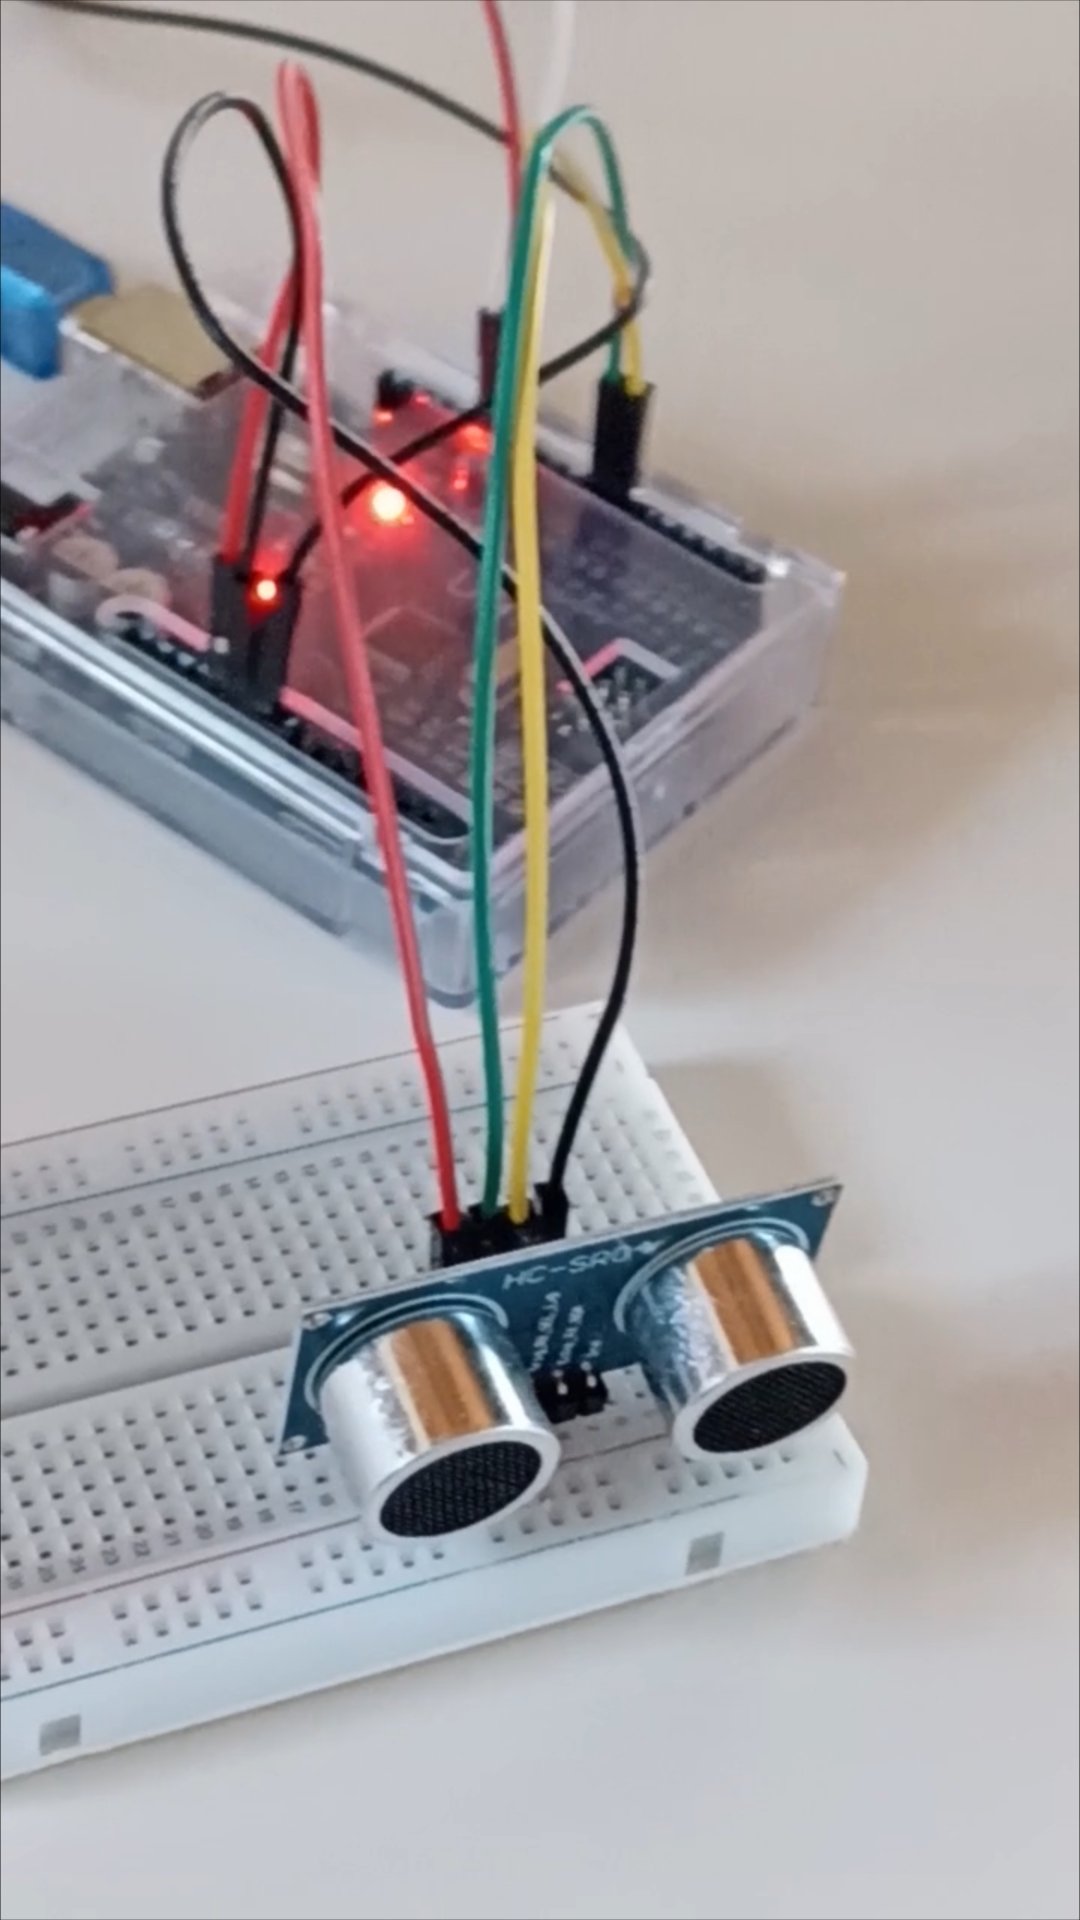
Building the circuit is very simple, a schematic diagram follows:

- Plug the sensor facing outwards (like in the picture) with first pin labeled VCC in line #10. GND pin should be in line #7
- Red patch cable from Arduino power block 5V to breadboard line 10.
- Green patch cable from digital pin #7 to breadboard line 9.
- Yellow patch cable from digital pin #6 to breadboard line 8.
- Black patch cable from Arduino power block GND to breadboard line 7.
 The remaining connections (cable to VIC-20) stay the same as in the previous projects so:
- White serial line: digital pin #12
- Red serial line: digital pin #11
- Ground of serial line: Arduino power block GND
At this point, it’s time to lauch the Arduino IDE and load the required software.
Arduino software
Load the project software (sketch file) inside the Arduino IDE. The sketch file can be found inside the ZIP you download by clicking below:
Software package: VIC-20 and Arduino project 4
Move the folder “VIC_to_Arduino_p4_Ultrasonic_Breakout” into your Arduino projects folder. Then start Arduino IDE and open the sketch “VIC_to_Arduino_p4_Ultrasonic_Breakout.ino” file.
Below the listing of the software, let’s comment it out a little bit.
// VIC-20 to Arduino - project 4: Distance sensor breakout // Arduino Software Serial library // Allows our Arduino Uno to communicate both with PC (local) and VIC-20 #include#define WHITECABLE 12 // VIC RX #define REDCABLE 11 // VIC TX const int trig_pin = 7; // Where sensor trigger pin plugged into const int echo_pin = 6; // Where sensor echo pin plugged into float timing = 0.0; float distance = 0.0; const int debug = 0; // Set to 1 for debug on serial // Define our communication line with VIC-20 SoftwareSerial VICSerial(REDCABLE,WHITECABLE); // Initialisation stuff - runs once on power-up/reset void setup() { pinMode(trig_pin, OUTPUT); pinMode(echo_pin, INPUT); digitalWrite(trig_pin, LOW); // Open serial communication (PC) Serial.begin(1200); // Send out local startup message Serial.println("ATTEMPTING TO CONNECT TO VIC-20"); // Set the baud rate to speak to VIC VICSerial.begin(1200); // Send message to VIC VICSerial.println("START"); } void loop() { char rx; char tx; int paddlepos = 0; if (VICSerial.available()) { rx=VICSerial.read(); if (debug) Serial.println(rx); if (rx>0) { // Char received - read position digitalWrite(trig_pin, LOW); delay(2); digitalWrite(trig_pin, HIGH); delay(10); digitalWrite(trig_pin, LOW); timing = pulseIn(echo_pin, HIGH); distance = (timing * 0.034) / 2; if (debug) { Serial.print("Distance: "); Serial.print(distance); Serial.print("cm | "); Serial.print(distance / 2.54); Serial.print("in | "); } if (distance <= 5) distance = 5; if (distance > 55) distance = 55; paddlepos = int((distance-10)/2); if (paddlepos<20) { tx = 48+paddlepos; if (debug) { Serial.print(paddlepos); Serial.print(" - "); Serial.println(tx); } VICSerial.print(tx); } // If valid paddle pos } // If VIC wants position } // If VIC serial channel works } // DO NOT copy any code you find below this line // --------------------------------------
- There is an int constant named debug at the top. If you want to see what’s happening behind the scenes (you will have to open up the serial monitor on the Arduino IDE for this) just set it to 1. This way, you will see when Arduino receives the command from VIC (it will be a “*” char) and you will see also the exact distance measurement in centimeters. Remember to set Serial Monitor’s speed to 1200 baud.
- The logic of distance measurement is well covered in this article. Here I will simply recall that the sensor sends an aultrasonic pulse and then measures time passed for the sound to hit the first obstacle and bounce back according to the formula:
distance = speed x time
Here, speed is the speed of sound (340 meters per second) and, since the pulse has travelled to the first obstacle and bounced back, the total time must be divided by two. - When measuring the distance, for a practical reason we will limit the distance range for the player’s hand between 5 and 55 centimeters. Then we normalize the distance number so that it falls between zero and 19. The paddle on the screen is 3 chars long, so 19+3=22 which matches exactly the number of columns that VIC-20 can use.
- Transmission of data. I wanted the data exchange to be as fast as possible. Thus, command from VIC-20 is just 1 char (an asterisk “*”) without any carriage return.
Also, I wanted the paddle position number (0-19) to be returned as a response to occupy just one byte of data. So here’s the trick behind the line of code:
tx = 48+paddlepos;
We will send back a “0” (ASCII char 48) to represent paddle position=0, a “1” (ASCII char 49) to represent position=1, and so on until we reach character “C” (ASCII char 67) to represent position=19. The char contained in the tx variable will be sent to the VIC-20 over the serial line.
Upload the software to your Arduino and that’s it. Let’s now switch to VIC-20.
VIC-20 Software
VIC-20 software can be found inside the software package you have downloaded: PROJ4TEST and ULTRABREAKOUT are the two programs. Transfer them onto a diskette or your SD2IEC device and you’re ready to go. If you can’t, you might type the programs using the listings below.
A note first: I developed the game with the 16K expansion fitted, but the program is short and might work on unexpanded too with a little modification I will explain at the end.
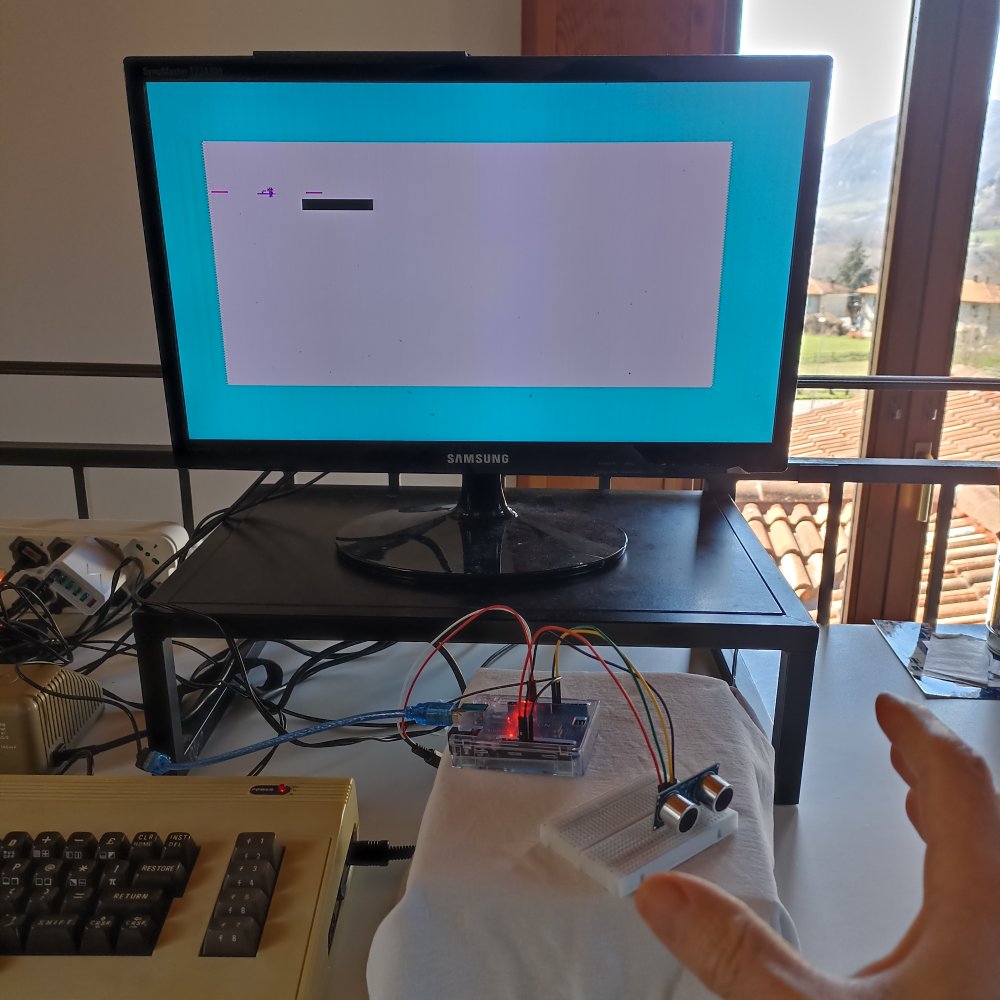 In order to better understand how the sensor works I recommend to start by loading and running the PROJ4TEST program, which is quite short and just lets you move a paddle on the screen by waving your hand in front of the sensor. It will work on any memory configuration. Here is the code:
PROJ4TEST
2 TI$="000000":PRINT"{CLEAR}":POKE36879,27
5 OPEN2,2,0,CHR$(8)+CHR$(0)
7 SP$="{SPACE*22}":C$="0":GOTO1000.MAINLOOP
10 IFTI>5THENTI$="000000":PRINT#2,"*";:RETURN
20 GET#2,B$:IFB$<>""THENP=ASC(B$)-48:IF(P>=0)AND(P<22)THENC$=B$:RETURN
30 P=ASC(C$)-48:RETURN
1000 REM ***MAIN LOOP
1010 PRINT"{HOME}{BLUE}{DOWN*3}"
1020 REM PRINT"{UP*2}{RIGHT*2}{GREEN}";TI;"{SPACE*2}"
1040 PRINT"{PURPLE}-";P;"{LEFT} -{SPACE*3}"
1045 PRINTLEFT$(SP$,P);"{BLACK}{REVERSE ON}{SPACE*3}{REVERSE OFF}{SPACE*22}";
1050 GOSUB10:GOTO1000
If you can move the paddle by moving the hand in front of the sensor, you have everything in order and you’re ready to load and run the game, UltraBreakout!
You will notice that the movement of the paddle is rather fluid.
In order to avoid saturating the connection line with transmission of requests and data, I used the VIC-20 internal timer TI$ and TI to wait at least 5 milliseconds between requests. You might change the value at line 10 (IF TI > 5) to experiment if you’d like.
Please note: As it stands, Arduino does not send to VIC-20 position of the paddle if it is not requested to do so. Why? Because VIC-20 serial line has a limited buffer. We need to avoid flooding the VIC with un-necessary data. If the VIC does not read and flush the buffer, the buffer space might fill up and there will be no room for more recent data. So the main loop does a request/read/display paddle at regular intervals allowing some millseconds for the data transmission to occur.
ULTRABREAKOUT
2 PRINT"{CLEAR}":POKE36879,172:POKE36878,15
5 OPEN2,2,0,CHR$(8)+CHR$(0)
7 SP$="{SPACE*22}":C$=CHR$(48+11):VM=4096:CM=37888:LV=3
8 GOSUB2000.PREP
10 GOTO1000.MAINLOOP
13 REM----------------
14 REM ***READ SENSOR
15 GET#2,B$:IFB$<>""THENP=ASC(B$)-48:IFP>=0ANDP<22THENC$=B$
20 PRINT#2,"*";
30 P=ASC(C$)-48:RETURN
990 REM ------------
1000 REM ***MAIN LOOP
1010 PRINT"{HOME}{BLACK}"S"{LEFT} ";TAB(3);:FORI=1TOLV:PRINT"S";:NEXT:PRINT"{SPACE*2}";
1015 PRINT"{HOME}{BLUE}{DOWN*19}"
1045 PRINTLEFT$(SP$,P);"{BLACK}{REVERSE ON}{SPACE*3}{REVERSE OFF}{SPACE*22}";
1050 POKEVM+INT(Y)*22+X,32
1052 X=X+DX:Y=Y+DY
1055 IFY<0THENY=0:DY=0.5:GOSUB2120
1057 IFY>22THENGOTO5000.FAIL
1060 IFX<0THENX=0:DX=-DX:GOSUB2120
1062 IFX>21THENX=21:DX=-DX:GOSUB2120
1070 IFPEEK(VM+INT(Y)*22+X)=32THENLH=0:GOTO1085
1072 GOSUB2100:IFPEEK(VM+INT(Y)*22+X)=250THENS=S+1:LH=LH+1
1074 DY=-DY:IFLH>1ANDDY<0THENDY=-DY
1080 IFINT(S/66)=(S/66)THENLV=LV+1:GOSUB2000:GOTO1000
1085 K%=INT(Y)*22+X:POKECM+K%,1:POKEVM+K%,81
1100 GOSUB15:GOTO1000
1990 REM--------------
2000 REM***PREP SCREEN
2010 PRINT"{CLEAR}{DOWN*3}{REVERSE ON}{GREEN}{SH @*22}{BLUE}{SH @*22}";
2020 PRINT"{YELLOW}{SH @*22}{RED}{SH @*22}{REVERSE OFF}";
2022 PRINT"{HOME}{BLACK}"S"{LEFT} ";TAB(3);:FORI=1TOLV:PRINT"W";:NEXT:PRINT"{SPACE*2}";
2030 X=11:Y=18:DY=-0.5:DX=-0.5:REM INIT POS AND DIR
2040 POKEVM+INT(Y)*22+X,81:POKECM+INT(Y)*22+X,1
2090 RETURN
2098 REM-------------
2099 REM *** SOUND
2100 POKE36876,220:FORI=1TO5:NEXT:POKE36876,0:RETURN
2119 REM***LOW PONG
2120 POKE36875,220:FORI=1TO5:NEXT:POKE36875,0:RETURN
4098 REM-------------
4099 REM *** FAIL
5000 FORI=220TO160STEP-1:POKE36875,I:NEXT:POKE36875,0:LV=LV-1
5010 IFLV>0THENGOSUB2030:GOTO1000
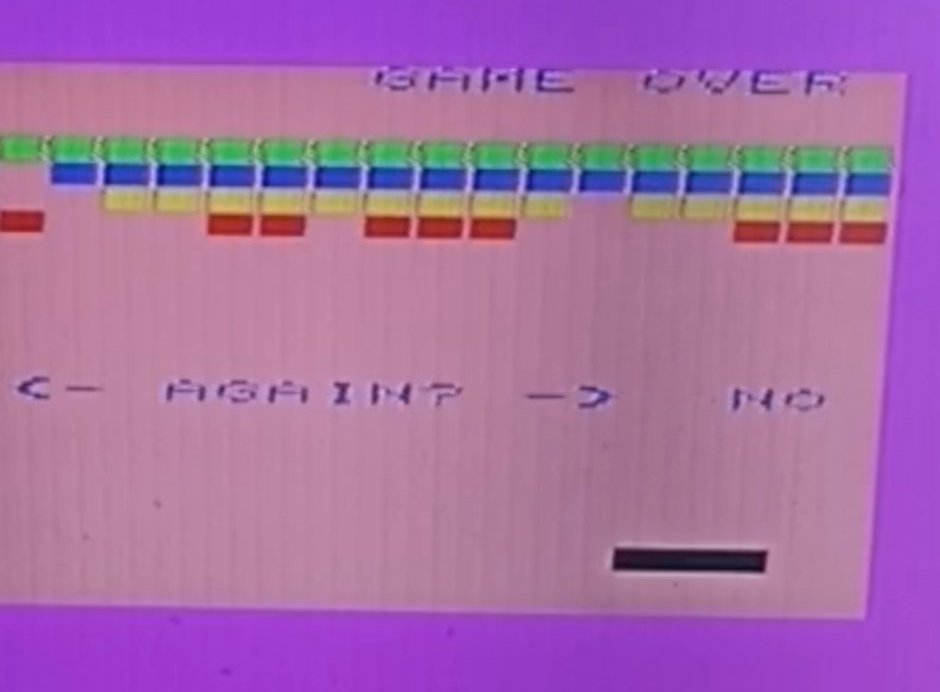
5012 PRINT"{HOME}{BLACK}"S"{LEFT}{SPACE*9}{BLUE}GAME OVER"
5015 PRINT"{HOME}{BLUE}{DOWN*13} YES <- AGAIN? ->{SPACE*2}NO"
5020 C$=CHR$(48+11)
5030 GET#2,B$:IFB$<>""THENP=ASC(B$)-48:IF(P>=0)AND(P<22)THENC$=B$
5032 IFTI>10THENTI$="000000":PRINT#2,"*";
5040 P=ASC(C$)-48
5042 PRINT"{HOME}{DOWN*20}"LEFT$(SP$,P);"{BLACK}{REVERSE ON}{SPACE*3}{REVERSE OFF}{SPACE*22}";
5046 IFP=2THENRUN
5050 IFP=18THEN5100
5060 GOTO5030
5100 POKE36878,0:POKE36879,27:PRINT"{CLEAR}VIC20RELOADED.COM{BLUE}":END
Lines 2-10: Initialisation and opening of serial connection. VM and CM are Video Map and Color Map. In order to work on unexpanded/3K, these should be changed to 7680 and 38400 respectively.
Lines 15-30: (subroutine) Reads paddle position char into C$ and P (actual number), if anything is coming from Arduino. It sends a “*” (read position!) command to Arduino at every call.
1000-1100: Main loop. Updates score at top screen, displays the paddle (line 1045), then erases the ball and computes next ball position (X,Y) depending on directions (DX,DY). If some object has been hit, modify ball’s direction.
Line 1057: If ball has passed the paddle line, go to fail routine (5000)
Line 1072 increments score S if a brick has been found (peek char code 250).
Line 1080 will somehow reset the screen if 66 bricks have been hit (22 bricks x 3 rows = score 66 or multiples of 66)
Line 1085 will show the ball at the new position, then read current paddle position (sub 15) and again at the beginning of the loop
2000-2090: (subroutine) Prepare the screen at the beginning of each level
2100,2120: Sound effect subroutines
 5000-5100: Fail. Sound effect, the decrement lives (LV). If lives are not zero, reposition ball and back to the main loop.
Line 5012: Game over. Request to play again but (yay!) use the sensor-controlled paddle again to choose. The code is a sort of a copy of line 15’s. Depending on the chosen position, either restart or end.
Ideas for further experimenting
The game code is simple and might be further optimized. For example,
- Line 1010 in the main loop prints available lives even though they will change only after a fail. This could be optimized.
- Level advance turns out to be buggy. I noticed only whil writing this tutorial. Level will advance after 66 blocks have been hit, but there are actually 4 rows of 22 bricks so the number 66 in line 1080 should be replaced with 88.
- Number of lives. If you want 5 lives for example, change to LV=5 at line 7
- Try running it on unexpanded or +3K by changing VM=7680 and CM=38400 at line 7
- I did not implement any direction change effect depending on the paddle’s move when the ball bounces on the paddle, but it would be possible. By remembering the last paddle position one could modify the DX (X direction) accordingly. DX and DY are floating numbers so the speed of the ball in each direction could be smoothly controlled.
 If you happen to create modified versions of this game, please send to info (at) vic20reloaded.com, I will include it in the package!
Conclusions
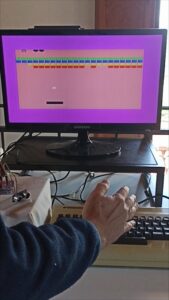
We have seen how to make a special sensor with Arduino which allows us to play Breakout on the VIC-20 just by moving our hand in front of the sensor.
As usual, I made a short clip on YouTube in order to let you give a glance at how it works.
Buying advice
If you don’t know where to get the parts for this project:
Stay tuned for another project in the series!
